March 2026
Using LoRA to Fetch Mail: A Smart Mailbox Solution
So I have a #JayWorldProblem. My mailbox is about 150m from my house, and being on a main road, posts kept getting stolen. This problem was easily solved with a lock, but I quickly grew frustrated with having to fumble with a lock and key only to finally open the mailbox and find it empty. So, I needed to find a way to know when a post arrived in my mailbox, so I can go get it. Easier said than done. This post is a write-up of my lessons, and how I used LoRA, time of flight sensor, ESP32 and a power solution, all linked up to Home Assistant, so I know when mail arrives in my mailbox.
The Problem
Before we begin, there were a few problems that needed to be solved:
- The distance: 150m of undulating land, covered by trees, 5+ houses, no line of sight, and a solid rock-wall where the mailbox was embedded within.
- The mailbox: Nothing could be outside as it would just get stolen or poked. So no antenna outside, and no sign of anything out of the ordinary to reduce attention and theft.
- Power: The mailbox is in a power waste-land, no utility that I can plug in to, and no solar due to risk of theft. So it needs a power source that can last a long time, and also ensure the system works reliably.
- Home Assistant: Our home runs on it, so needs to integrate into this.
- Cost: Got a home loan here! I need a solution that works cheaply and well.
So I started drafting out some plans. After a while, I came up with this parts list that I used:
- ESP32-C3 Supermini for the transmitter
- ESP32-DevKit for the receiver (could have used C3 here as well)
- 2x SX1278 LoRA 433mhz modules with tiny string antennas
- MCP1700 for voltage regulation
- 3x AA batteries
- 3x AA battery holder
- VL53L1X Laser Ranging Flight Time Sensor Module
You can find all of these super cheap on AliExpress. The total cost was about $30 NZD.
The plan was to have a transmitter inside the mailbox which used a time of flight sensor to detect if mail had fallen in. The difference in distance from the constant would be the indicator that mail was in the box, and would then send a signal to the ESP32, which would broadcast the distance using the SX1278 module. For power, I initially tested with a USB-C power bank, then used a 3x AA battery pack with MCP1700 as voltage regulators. More on that soon.
The receiver side is simple - just a ESP32 with the LoRA receiver, powered by USB-C, and self-hosting itself as a web-server that my Home Assistant can poll.
The Field Test
Having never used LoRA before, I drove out to a friend's place in Hobsonville, where we quickly got to work soldering and coding. Within 2 hours we had a working prototype powered by USB-C, so I went for a drive around the block with the transmitter in the passenger seat, and the receiver at home. With line of sight, I was averaging about 340m range, which is not bad considering how small everything is. However, with obstacles / houses in the way, I was intermittently successful at 114m and closing. Anywhere above that the signal would drop. This was promising as it meant my use case of 150m was probably achievable, given it wasn't as obstructed as Hobsonville point houses, but also with a bit of leeway given the 300+ range with line of sight.

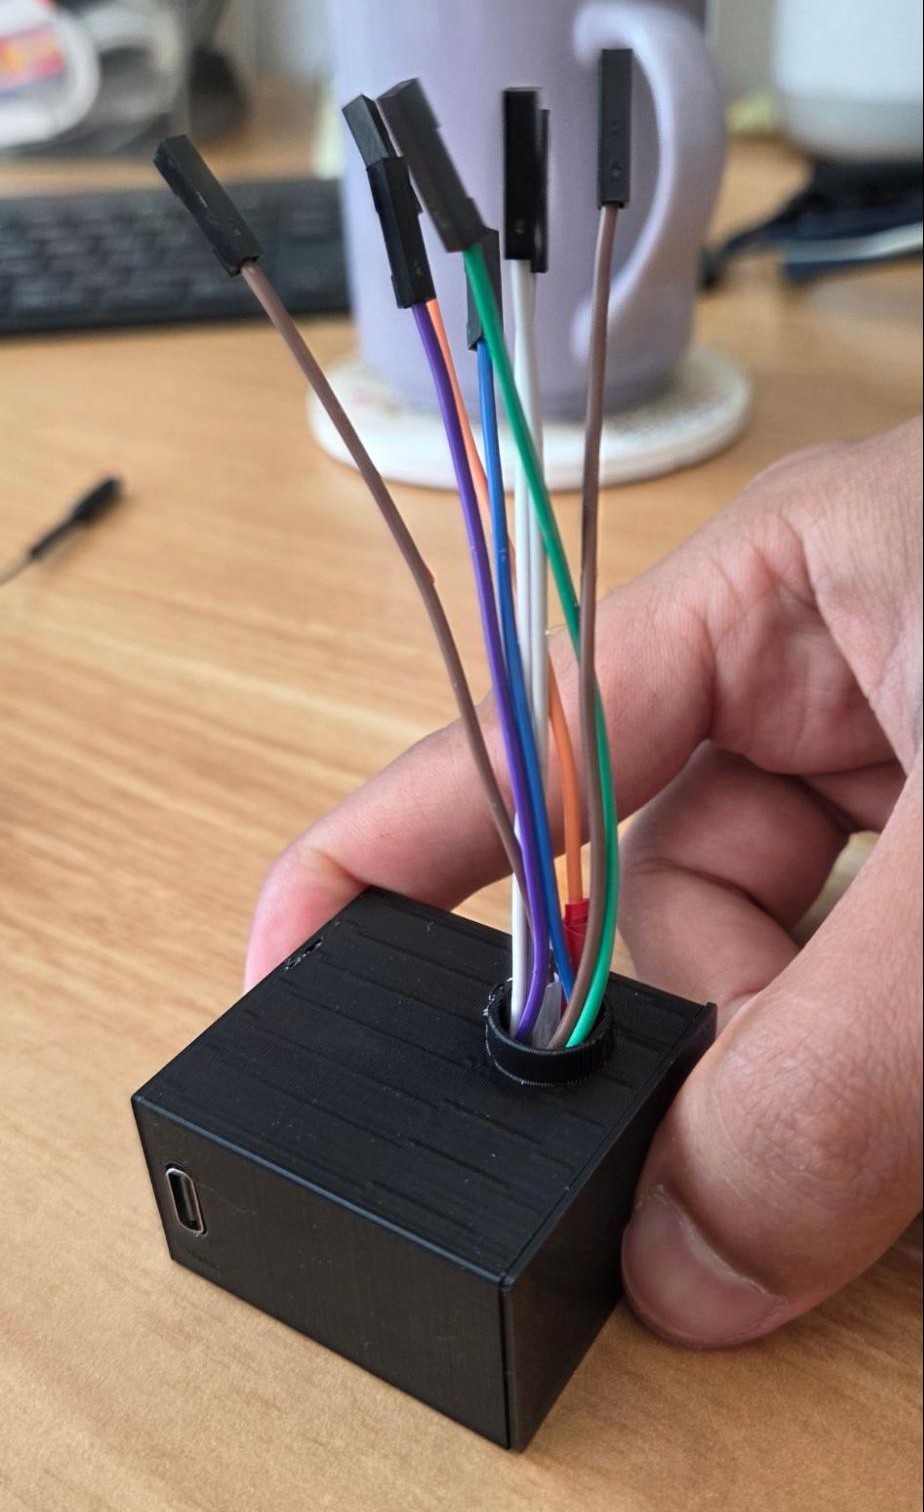
The ESP32D - so small! The 32C is even smaller!
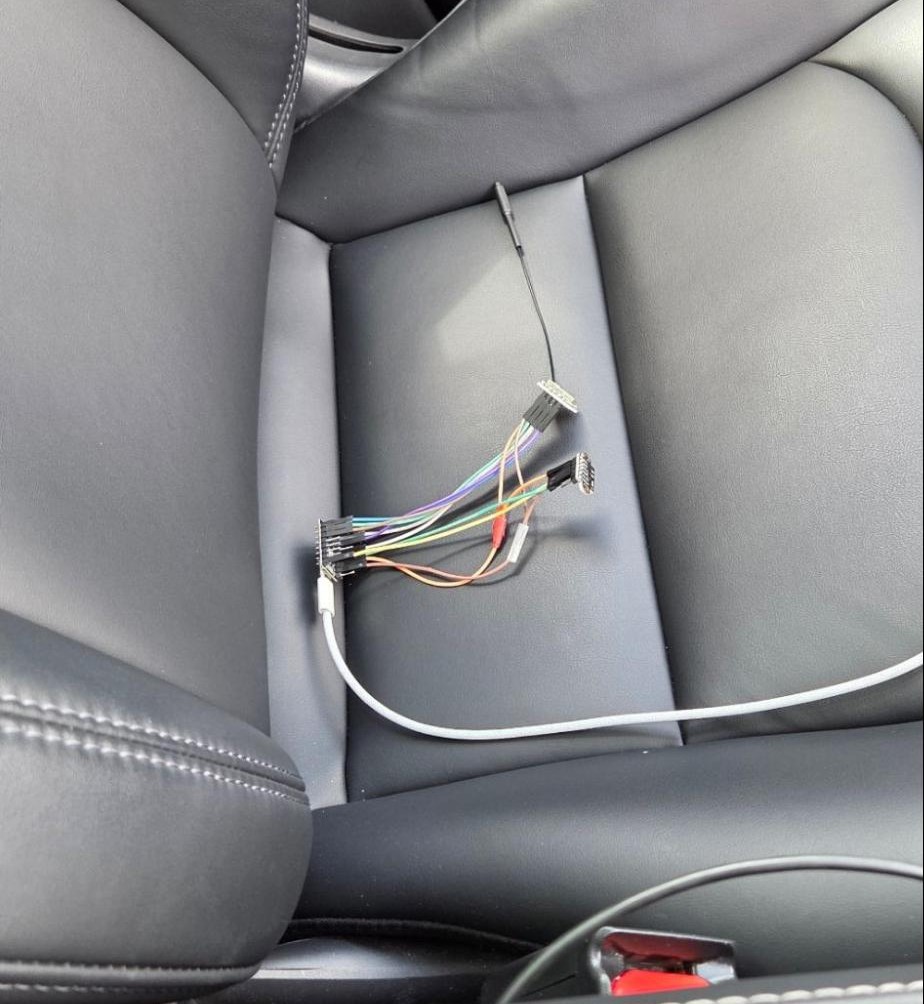
Field testing the LoRA range with the transmitter in the car seat.
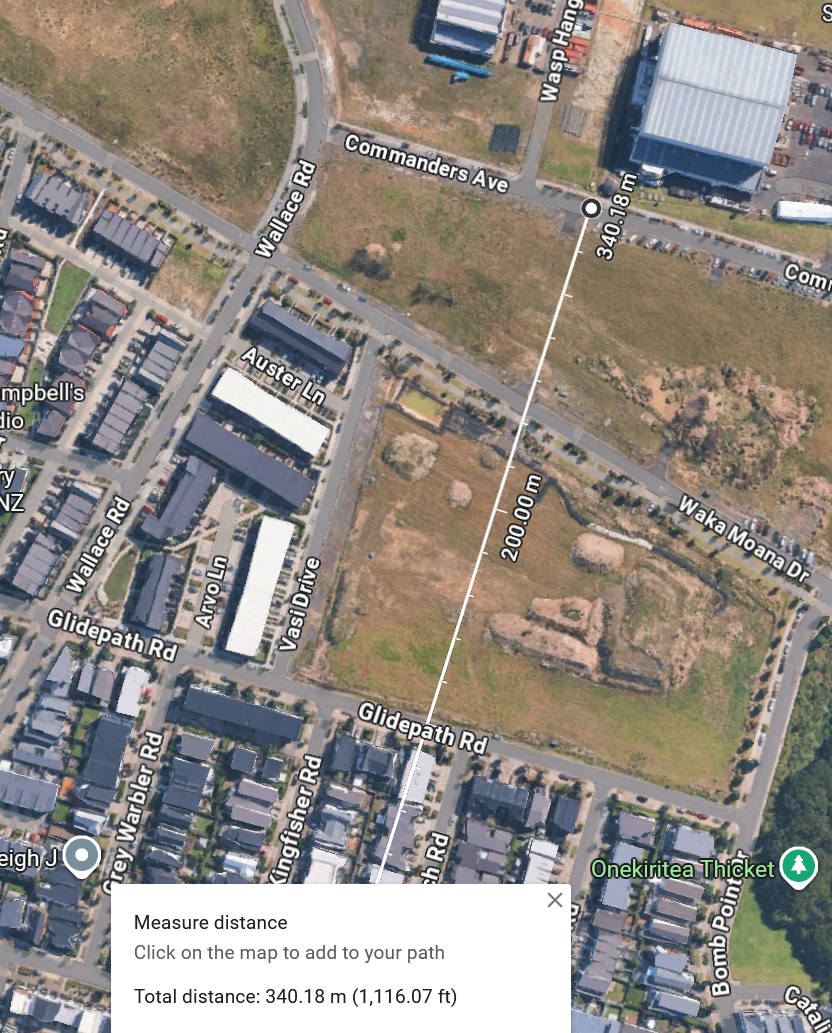
Line of sight range in Hobsonville.

Obstructed sight range in Hobsonville.
Back home, given we had a working prototype, I quickly validated the full data flow to Home Assistant, which also worked well. The distance from the time of flight sensor was passing well and accurately to the receiver, and then polled successfully from the Home Assistant server via WiFi.

Home Assistant displaying real-time distance data.
Great! I've now successfully validated the hardware and data-flows are working. We are able to detect distance, and transmit it via LoRA to the receiver, which then acts as a web-server for Home Assistant to retrieve and display data to me, the end-user. It's also very easy to configure Home Assistant to say if the mailbox is full or empty based on the distance, so no issues with getting the actual distance up to this point, and a good thing for future troubleshooting.
The Physical Test
Now that we've validated it working in the field and well, it was time to test the setup at home. For this, I decided to do a week long trial using a USB-C power bank on the transmission side, and finalise the receiver side. I had a 3D case printed for both, partially for aesthetics, but also environment proofing. A lot of electrical tape was used on the transmitter side - the last thing I wanted was moisture ingress!
3D printed protective enclosure for transmitter.
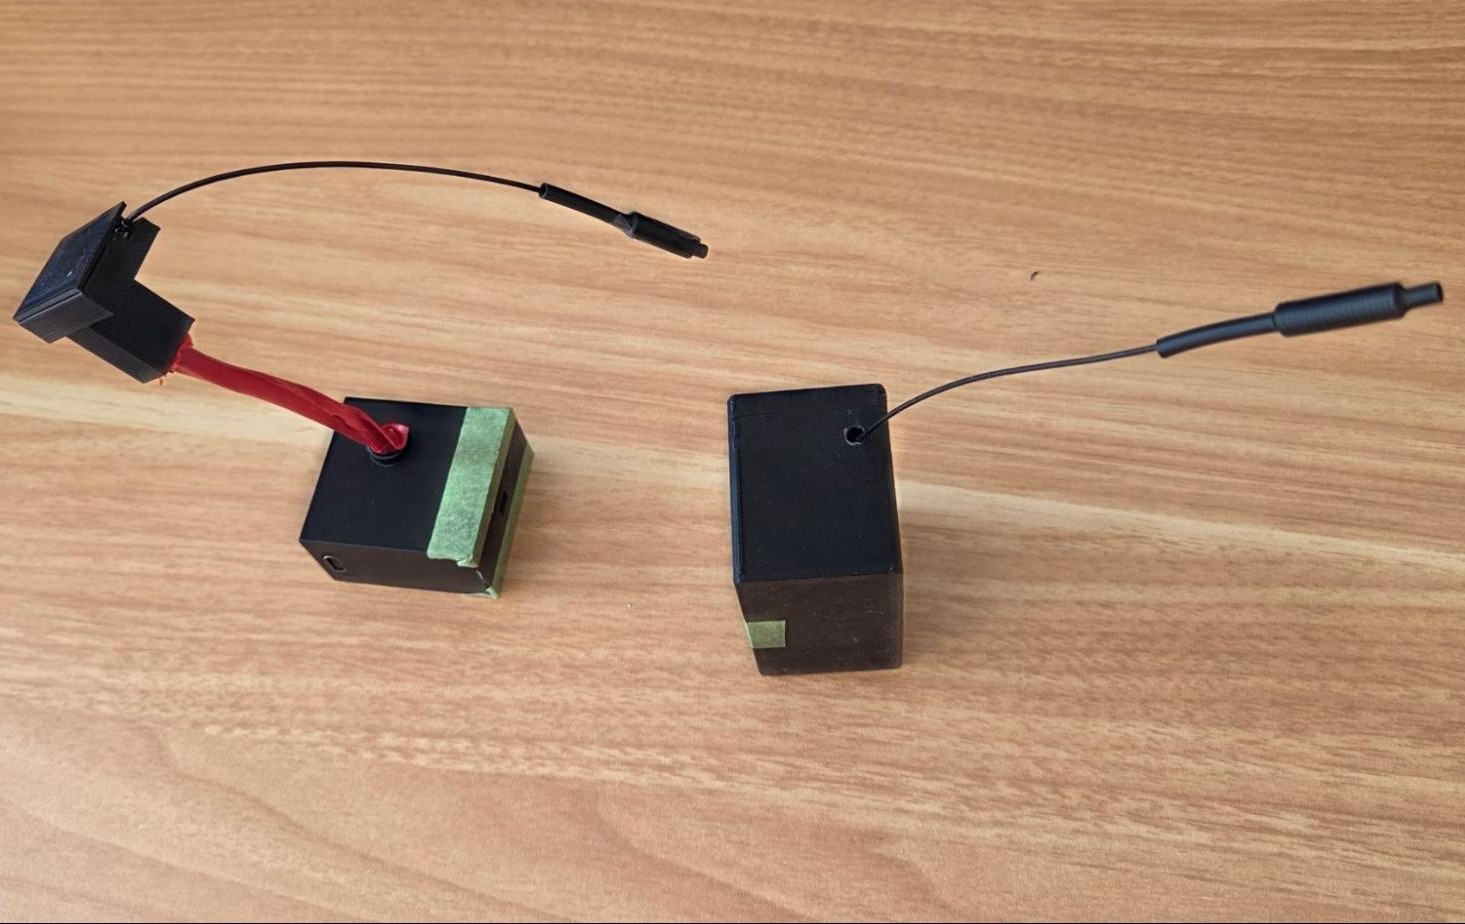
Tx and Rx ready to go!
Early stage mailbox installation and testing.
Now that I was operating in the actual environment, a few issues cropped up. First was the range. The postbox was a wooden box surrounded by hard rock, a natural faraday cage. This meant the antenna had to be positioned just right for the system work. To fix this, I used a cable clip to position it in the right way at all times, and also changed the bandwidth to ensure it would be more reliable. Knowing this was a risk, I had opted for 433mhz at the start of this, which is better at penetrating objects.
The second issue was that post could easily fall below the time of flight sensor given how thin paper is. This was easily solved with a cardboard wedge, so all mail would land on an incline and "cut" the distance of the sensor.
Once these issues were solved, the sensor worked beautifully! At this stage, the transmitter was always on, and sending broadcasts every minute, so I had near real-time visibility for the mailbox. Of-course this was for test purposes, but the performance was good.
Power Source
About 5 days in, the 10,000mAh battery was empty and the transmitter stopped. I wasn't keen to be replacing and charging battery packs every week, so the hunt was on for a suitable power source. The ESP-32 C3 is a lower power device and is designed for these kinds of operations, which is why I chose it. LoRA is also great for low power usage, and the tFL sensor can be triggered at-will, so I knew I had the capability. My entire setup is operating on a 3.3V rail, and so I needed to ensure I could work to this. Initially I went down the route of using a 17500 rechargeable battery, but didn't fancy the cost - $10+ for the battery, and would still need to charge it. I also looked at button batteries and power banks in low power mode, but the most reliable option looked like 3xAA batteries in series with a LDO regulator to bring it down to 3.3V. So I got the soldering iron out, set it up with a MCP1700, and got it working.
To increase the lifespan of the batteries, I have set the firmware up so it broadcasts every second for a minute, then sleeps for 2 hours. A two hour interval is perfectly fine as nobody is going to be checking the post that frequently. Once I have a bit more confidence, I will probably move to a twice daily check-up.
Based on my calculations, it should last me more than 5 years with the Alkaline batteries:
- Battery is about 2500mAh
- Active burst (~2 seconds every 2 hours): negligible averaged out
- Deep sleep: ~5µA (from datasheet Table 4-9)
- MCP1700 quiescent current: ~1.6µA
- VL53L1X standby: ~5µA
- SX1278 sleep: ~0.2µA
- Total average: ~12-15µA
- 2800mAh ÷ 0.015mA = ~187,000 hours theoretical
So this becomes a set and forget solution.
AA battery pack with voltage regulator and component mounting.
Given the bulk of the battery pack, my old 3D printed cases wouldn't work here. Instead I opted for some number-8 wire thinking and used a takeaway food container from last night's dinner. I drilled a small hole for the LoRA antenna, and another one for the tfl sensor. I also drilled holes next to it so that I could cable tie the solution together. The advantage of all of this was practicality. I could easily repair or replace the plastic box, it offers some heat dissipation, and was free.
Final enclosure: a repurposed takeaway container with cable routing.
And the final act - installation!

Transmitter installed inside the mailbox.
And of-course, the final touch is the Home Assistant card. Green for empty, red for full. The receiver shows several stats, including if it has lost touch with the transmitter, and when it last received a packet, kind of like Houston Mission Control communicating with Mars rovers over here!
Home Assistant card showing empty mailbox status.

Home Assistant card showing full mailbox status.